Operations on objects
Insert an autoshape
To Add an autoshape to a slide,
-
in the slide list on the left, select the slide you want to add the autoshape to,
-
click the
 Shape icon on the Home or Insert tab of the top toolbar,
 -
select one of the available autoshape groups: Basic Shapes, Figured Arrows, Math, Charts, Stars & Ribbons, Callouts, Buttons, Rectangles, Lines,
-
click on the necessary autoshape within the selected group,
-
in the slide editing area, place the mouse cursor where you want the shape to be put,
Note: You can click and drag to stretch the shape.
-
once the autoshape is added, you can change its size, position and properties.
Note: To add a caption within the autoshape, make sure the shape is selected on the slide and start typing your text. The text you add in this way becomes a part of the autoshape (when you move or rotate the shape, the text moves or rotates with it).
It's also possible to add an autoshape to a slide layout.
Adjust autoshape settings
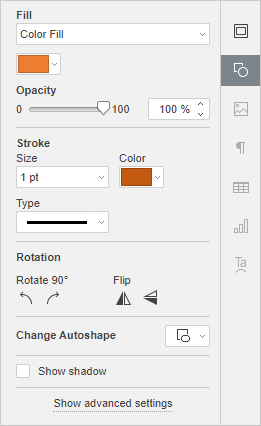
Some of the autoshape settings can be altered using the Shape settings tab of the right sidebar. To activate it, click the autoshape and choose the Shape settings  icon on the right. Here you can change the following properties:
-
Fill: use this section to select the autoshape fill. You can choose the following options:
-
Color Fill: to specify the solid color you want to apply to the selected shape.
-
Gradient Fill: to fill the shape with two colors which smoothly change from one to another.
-
Picture or Texture: to use an image or a predefined texture as the shape background.
-
Pattern: to fill the shape with a two-colored design composed of regularly repeated elements.
-
No Fill: select this option if you don't want to use any fill.
For more detailed information on these options, please refer to the Fill objects and select colors section.
-
-
Stroke: use this section to change the autoshape stroke width, color or type.
-
To change the stroke width , select one of the available options from the Size drop-down list. The available options are: 0.5 pt, 1 pt, 1.5 pt, 2.25 pt, 3 pt, 4.5 pt, 6 pt. Or select the No Line option if you don't want to use any stroke.
-
To change the stroke color , click on the colored box below and select the necessary color. You can use the selected theme color, a standard color or choose custom color.
-
To change the stroke type , select the necessary option from the corresponding drop-down list (a solid line is applied by default, you can change it to one of the available dashed lines).
-
-
Rotation is used to rotate the shape by 90 degrees clockwise or counterclockwise as well as to flip the shape horizontally or vertically. Click one of the buttons:
-
 to rotate the shape by 90 degrees counterclockwise
 -
 to rotate the shape by 90 degrees clockwise
 -
 to flip the shape horizontally (left to right)
 -
 to flip the shape vertically (upside down)
-
-
Change Autoshape: use this section to replace the current autoshape with another one selected from the drop-down list.
-
Show shadow: check this option to display shape with shadow.
To change the advanced settings of the autoshape, right-click the shape and select the Shape Advanced Settings option from the contextual menu or left-click it and press the Show advanced settings link on the right sidebar. The shape properties window will be opened:
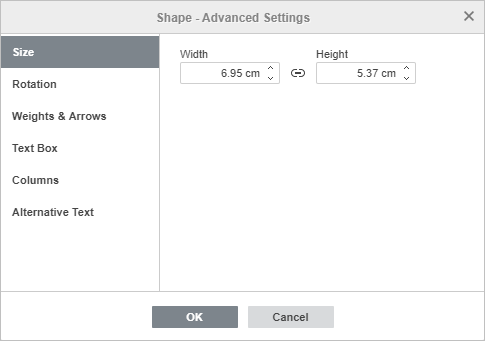
The Size tab allows you to change the autoshape Width and/or Height. If the Constant proportions button is clicked (in this case it looks like this
  ), the width and height will be changed together preserving the original autoshape aspect ratio.
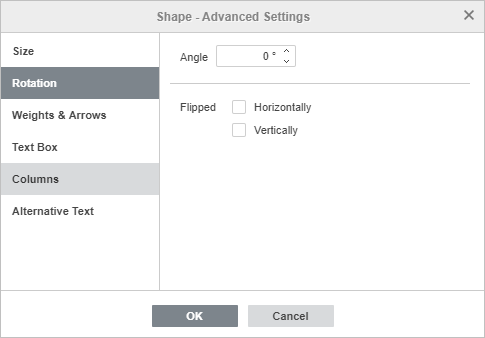
The Rotation tab contains the following parameters:
-
Angle: use this option to rotate the shape by an exactly specified angle. Enter the necessary value measured in degrees into the field or adjust it using the arrows on the right.
-
Flipped: check the Horizontally box to flip the shape horizontally (left to right) or check the Vertically box to flip the shape vertically (upside down).
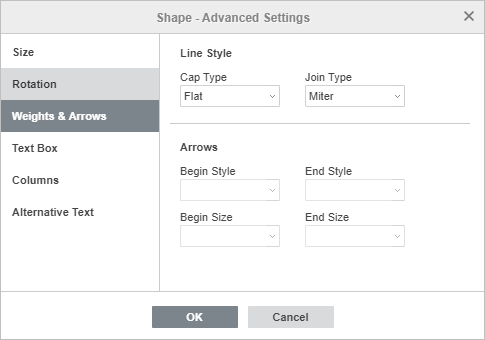
The Weights & Arrows tab contains the following parameters:
-
Line Style: this option allows specifying the following parameters:
-
Cap Type: this option allows setting the style for the end of the line, therefore it can be applied only to the shapes with the open outline, such as lines, polylines, etc.:
-
Flat: the end points will be flat.
-
Round: the end points will be rounded.
-
Square: the end points will be square.
-
-
Join Type: this option allows setting the style for the intersection of two lines, for example, it can affect a polyline or the corners of the triangle or rectangle outline:
-
Round: the corner will be rounded.
-
Bevel: the corner will be cut off angularly.
-
Miter: the corner will be pointed. It goes well to shapes with sharp angles.
Note: The effect will be more noticeable if you use a large outline width.
-
-
-
Arrows: this option group is available if a shape from the Lines shape group is selected. It allows you to set the arrow Start and End Style and Size by selecting the appropriate option from the drop-down lists.
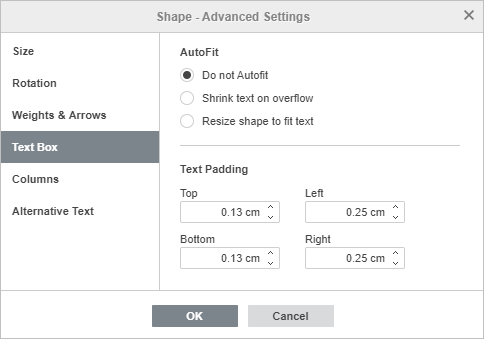
The Text Padding tab allows you to change the autoshape Top, Bottom, Left and Right internal margins (i.e. the distance between the text within the shape and the autoshape borders).
Note: This tab is only available if text is added within the autoshape, otherwise the tab is disabled.
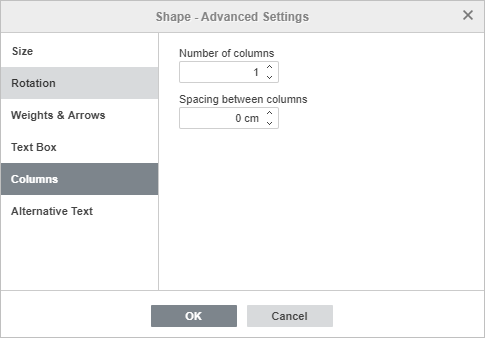
The Columns tab allows adding columns of text within the autoshape specifying the necessary Number of columns (up to 16) and Spacing between columns. Once you click OK, the text that already exists or any other text you enter within the autoshape will appear in columns and will flow from one column to another.
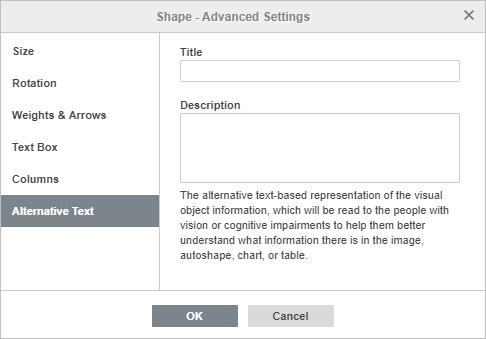
The Alternative Text tab allows specifying the Title and Description which will be read to people with vision or cognitive impairments to help them better understand the contents of the shape.
To replace the added autoshape, left-click it and use the Change Autoshape drop-down list on the Shape settings tab of the right sidebar.
To delete the added autoshape, left-click it and press the Delete key.
To learn how to align an autoshape on the slide or arrange several autoshapes, refer to the Align and arrange objects on a slide section.
Join autoshapes using connectors
You can connect autoshapes using lines with connection points to demonstrate dependencies between the objects (e.g. if you want to create a flowchart). To do that,
-
click the
 Shape icon on the Home or Insert tab of the top toolbar,
 -
select the Lines group from the menu,

-
click the necessary shape within the selected group (excepting the last three shapes which are not connectors, namely Curve, Scribble and Freeform),
-
hover the mouse cursor over the first autoshape and click one of the connection points
 that appear on the shape outline,
-
drag the mouse cursor towards the second autoshape and click the necessary connection point on its outline.

If you move the joined autoshapes, the connector remains attached to the shapes and moves together with them.
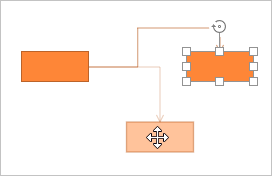
You can also detach the connector from the shapes and then attach it to any other connection points.

